“if you have found a different tool in GCP that will make a new image that includes all of the additionally installed packages and data, then I would really like to hear about it”
BKM first my Disclaimer - I have zero GCP experience only Linux KVM - so your learning benefits all including me!
My guess is you want to use gcloud to make a ‘boot disk’ aka ‘root persistent disk image’ attached to your ‘current’ instance, and from that ‘boot disk’ then create a custom image?
These two pages explain your chicken and egg instances case
Way to go John… you planted that seed in my OCD brain and I couldn’t put it out of my head until I read every last page, all the linked pages, tried all the steps, and figured it out. So, thank you (I think)
So, after reading for a several hours and trying every rabbit hole the documents led me down, I managed to find the easy route to making a Custom Image on GCP.
The simplified version…
Use the post at the top of this thread to make your own customized ERPNext instance on GCP. This will be the basis for your custom image
When you are satisfied with the instance and want to preserve it for replication, use the STOP link to stop the instance from running.
Click on the now “stopped” instance to go to the instance details page
Click the EDIT function so you can change things here
Scroll down the page until you find “Delete boot disk when instance is deleted” and UNCHECK the box, then save your changes
Now click on the DELETE function to delete the instance. I know this sounds scary because you have already put a lot of work into making this, but you are only deleting the “running instance” and NOT the actual boot disk where the everything starts. You cannot create a custom image unless you disconnect the running instance and the only way to do that is to delete it but leave the boot disk in tact.
Once it is deleted, go to the left column of the screen and select “Disks” from the Compute Engine menu
Here you will see the boot disk for the instance you just deleted and the far right “In Use By” column will be blank. This is now available for you to create boot disk images similar to the Debian8 image you used to create your ERPNext system. So, Click on the disk name to go to the disk details screen.
At the top of the screen click on the “Create Image” function
Type in a name for your new custom image and click the “Create” button at the bottom of the screen
After a few minutes (2 min in my case), the screen will change to indicate it is finished. Click on the Disks link again to see you disk is still there, then click on the “Images” link and your new custom image should be prominently listed near the top!
To start a fresh instance of your customized image, just click on the image (just like you did when you used the Debian8 image but this time use your new customized version), then click “Create Instance” at the top of the page.
Change all the important information for the instance you are about to start, like a name, the zone to run it, and the http/https check boxes, then click “Create”. In about 3 minutes your very own personalized ERPNext image will be running. Just use the external IP address to access it like you did with the original before.
So, there you go. I have typed out how to get your first ERPNext instance running at the top of this thread, and now I have typed out the instructions for how to turn it into a re-usable custom image!
In my case I created a re-usable custom image of a fresh ERPNext server that has not yet been started. In other words, I had not done the first administrator login. This way I can spin up a breand new ERPNext system in just a few minutes and then do the first login and make it for anything I want to test.
I think I will do this while building large client systems. I can start with the image I created today, stop once I get the first batch of data entered and make another new image up to that point. Then I can remake new images each step of the way as I modify and populate large client images. This way if I screw up the data at some point during the import process I can go back to my last good image and re-do the import I screwed up without having to scrap the whole system and start over. I like this already!
Ok, Everyone… please thank @clarkej since his post pushed me to go figure it all out and boil it down to the simplest Step-by-Step process. Had he not taken the time to find the right starting point in the reading material and plant that seed in my weird little brain, I might not have bothered to try and figure this out for another month or two.
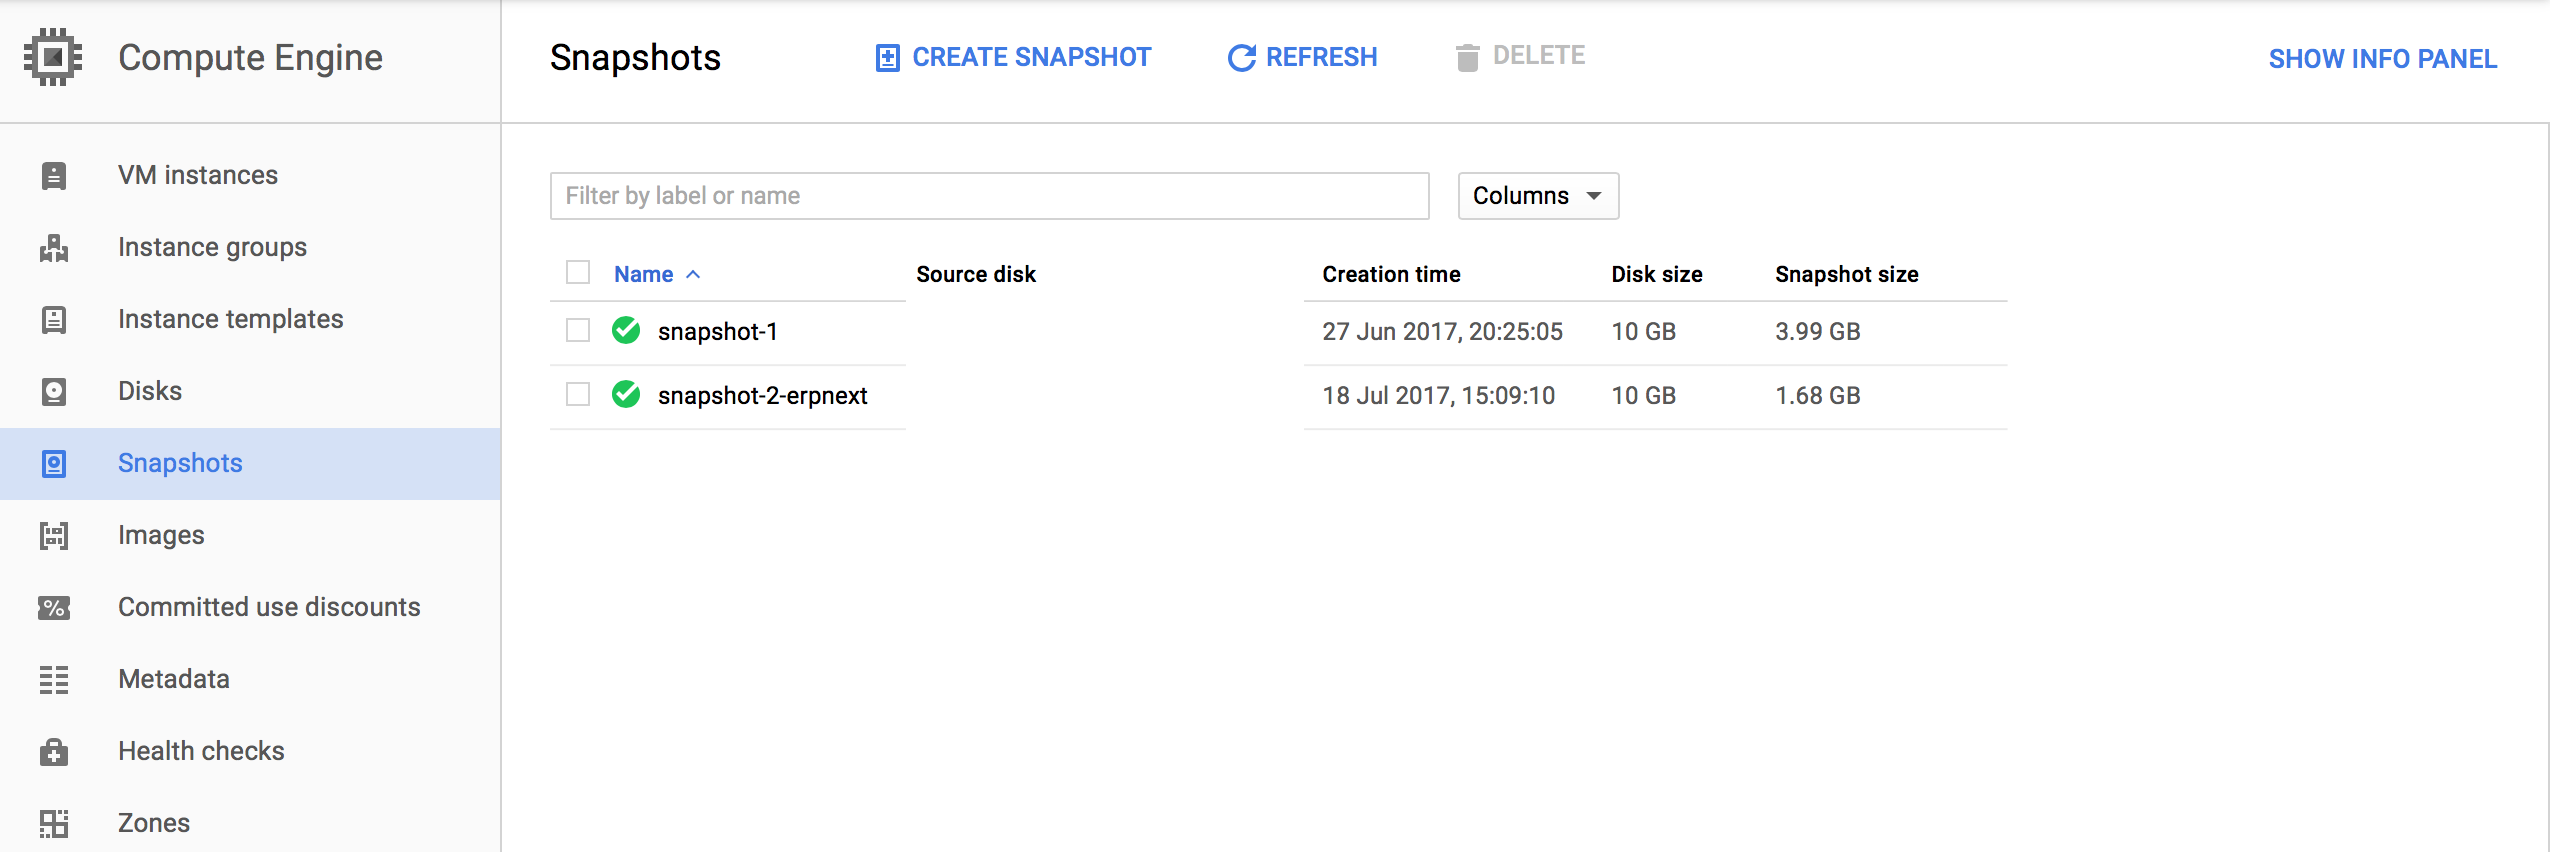
Hi @bkm Sorry for my late reply. I am glad you have figured out a new way. I never tried your steps before, from the beginning, I used Snapshot for regular backup or clone with it. You can find “Snapshot” next to “Custom Image”. Before using snapshot, you need to create one first on Snapshot tab on left side. (see attachment)
After you create an image, can you share it with others so that people can have fresh ERPNext in second by uploading it with GCP? Thanks.
BTW, I saw your post in the thread. Do you encounter upgrade issue with fresh ERPNext installation (not Bitnami version)?
Well… I have not figured out how to take the image away from GCP, and I am not sure that you can. According to the documentation, custom images cannot be shared outside the project they where they were created. As much as I would like to make a publicly sharable image, I do not think GCP allows for that function.
You can import external images to GCP, but I have yet to find a way to EXPORT them back to your local system. We would need to be able to do that before we could then share it out publicly.
I do not attempt upgrades once I have a system running. In the past this was because I had no way to recover my system if the upgrade failed. I had tried it several times and used many different advice from the forum each time to attempt upgrades, but none of them ever worked. I always had to strip the server and start over again. That was a real headache and very wasteful of my time.
However, that was all during the transition from version7 to version 8, and again from version 8.0.x to 8.1 or 8.2. The Developers may have addressed the update failures by now, but my reading of the recent posts indicates there are still issues. Now that we have the instructions in this thread we may be able to try things we would have avoided in the past.
The good news is that if you want to try an update, you can make a custom image of your VM instance then try the update. If the update works then you make another fresh custom image so you can get back to that update state if something goes wrong later. If the update fails or corrupts your system, just delete the VM instance and restart custom image made prior to update in a new instance until the update function works better.
Some restrictions apply for eg. only Chrome browser support, no Windows images
As well you may need command line access!? This page states ‘The Cloud Platform Console enables you to perform basic storage management tasks with your data using a browser’
Well, I have put in some time with researching the “Snapshot” function and it has its drawbacks. The documents that @clarkej pointed to actually use the snapshot function as part of the steps to make an exportable image.
Unfortunately, the snapshot function requires that you separate how you store information from your application so that you can have the most optimized snapshot image. It will take a great deal more reading and experimenting to actually make that work. You see, the snapshot is just that, a snapshot of the entire disk image including the cache, buffers, and swap data all of which is really unwanted in a clean image.
I don’t know. Maybe it’s worth the extra wasted space and the excess waste every time you do an incremental snapshot just to make it easier to manage. It becomes a matter of weighing the cost of the extra storage over the long term against the up-front work required to make everything operate in a more efficient way in the first place.
I will have to think about this one. I am pretty sure I will try it at least once just to see if I can port the custom image to another platform. Maybe the result of that test will determine just how much effort I want to put into the rest of the portability scenario. It really is a much bigger effort than the other two I detailed here and would not be for the novice unless I can find the shortcuts to make it easier to manage.
Anyway, that will have to be for another day. I am fairly behind right now in my deliverables and will come back to this in another 2 or 3 weeks. Thanks @Robert1112 for the pointer to snapshots and thanks @clarkej for the documentation pointer for making the image exportable.
Thanks for your very thorough work ! I’ve a question however, did you change anything in GPC configuration to get mail working ? I know you need to allow access for less secure application, but excluding that, does it work with just your step by step primer conf ?
Thanks !
Mel
Ahh… what a timely question! I have NOT tried using the email functions in ERPNext up to this point. However, I do need to get it working in the next few days.
So, the current answer to your question is: “I really do not know”
This process I outlined is very easy to use and further down the same thread I also outline how to create a Virtual Disk Image that contains all of your data and configuration settings that you can spin up any time you feel the need to start over again fresh. This should allow you the flexibility to try many different things on any populated instance with the assurance that you can always get back to a starting point that is NOT a complete rebuild.
If you find in your work that the steps I outlined work for using the email functions, then please report back here for others to also know. If you find there are steps needed to be changed in order to get the mail working, then also report that here. Everyone will benefit.
In fact, if you find there needs to be changes, let me know and I will edit the fist post to include your changes and happily note your contribution to the original work right next to the new information.
that’ll be my pleasure, but I’m afraid I’m currently completly stuck.
I’m swimming in the proverbial GPC doc pool. If I don’t drown there, I promise I’ll come back here to report.
I’ll follow your advice about Virtual Disk Image, it makes sense, and if necessary I’ll be able to vent my anger by disintagrating the disobligeant image.
Thanks for the quick answer !
Edit: I think we nailed it. Using your setup, we got it to work rather smoothly. Our sysadmin created a gmail smtp-relay and opened output ports. I asked him to write down the steps to post here.
That is Great News! We are looking forward to your post with those instruction steps.
BTW… Look for an update to the original post on this thread sometime in the next several days. I am hoping to make it a little easier and better for upgrading later.
Unfortunately, I was still learning when I wrote this. The steps I outlined above will give you a running system, but a mistake in the steps prevents the system from being updated. I tried to go back and fix it but we are not able to edit a post after it is about 30 days old.
If you use the above steps, just change the install command to the following:
Just replace “username” with the username of your Debian install. When you are using the command line, the user name is that part of the prompt before the “@” sign. If you use the --user switch in the install command, then you will be able to update the bench later if you ever need to.
If you do not use the --user switch, then the programs are installed by default into a user called “frappe” which has no login credentials and therefore you cannot ever update the bench.
Hope this helps. If you have already made a server you can always delete it and build one up again in just a few minutes using the correct install command.
When using the Google Cloud Platform, I was not able to create credentials for the frappe user in Debian 8. I have not tried Ubuntu because I never liked the user interface of it.
The Google Cloud Platform is just a place to experiment. You can quickly setup and delete servers there, or clone them for other testing purposes. I was most familiar with Debian, so that is what I used. In order to write a “step by step” guide, I had to work in familiar surroundings and Debian was the obvious choice.
Users that follow the steps will be able to really exercise he ERPNext system without having to stress over how to install it. If they are happy with it, they can even keep it on GCP and just pay for a permanent ip address. Sometime ago when I started out with ERPNext, the foundations cloud services were very reasonable. Now I believe they are quite over priced for the level of uncertainty you are forced to contend with on a weekly basis. If you use the ERPNExt cloud services for your production environment, you will be constantly having to learn what changed each week as the new versions are updated into the system. Anyone actually trying to use the system in production cannot possibly put up with that level of uncertainty. They will want to know the system works exactly the same today as it did yesterday and last week or last month. The rapidly changing versions just does not fit into a stable working environment.
Anyway, as it stands now, I will have to try to get it to work on CentOS 6 because that seems to be the only OS many of the service providers are offering in their VPS packages. CentOS 6 is it’s own set of problems because it is so old.
As a newbie (in programming, in ERP, and in business) who wants to try ERPnext, this really helps in understanding how the server setup works.
I think the text instructions are sufficient and clear enough (for readers: reading the whole text and outlining the actual steps helps). In addition, its free and easy to start over again. The $300 credit works for google accounts outside US, I’m in the Philippines.
Got a debian8 VM instance with ERPnext v10 which should last free for ~7months. I just want to use this window time to train the company I’m working with to help them deploy an ERP (we are currently using spreadsheets).
A bit off-topic, but so far, the real challenge isn’t the setup, nor the UI, but the actual mapping of business process itself and putting it into the ERP.